Build an AI Agent with n8n
Before AI agents came along, we were already automating plenty of tasks with tools like Zapier, Make, or n8n. But let’s be real: it was all very rigid. We built precise action chains with clearly defined inputs and outputs—for example, “when I receive an email, create a task in Trello.” Nice automation, but totally unable to handle anything outside the predefined box.
The full automation, in your inbox
Quick Definition – What Is an AI Agent?

Tutorial – How to Build an AI Agent with n8n
Requirements: n8n instance & API keys.
! You'll needRequirements: n8n instance & API keys.
- A self-hosted n8n instance with terminal access.
- API credentials for the services used in this workflow.
The full automation, in your inbox
Tutorials in this guide.
Build a Simple Conversational AI Agent in n8n (Beginner).
In this tutorial, you’ll learn how to create a simple chatbot connected to French Wikipedia using n8n. The main goal isn’t to build a high-performance agent but to understand the basics: how an AI agent works with its trigger, tools, memory, and LLM (the agent’s “brain”). This first project will help you build skills around key concepts, and you’ll be able to expand it later—for example, by connecting it to Telegram to turn it into a real personal assistant.
- 01
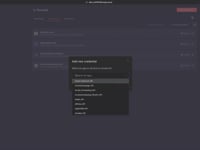
Add OpenAI Credentials in n8n
Now that you’ve got your OpenAI API key, it’s time to connect it to n8n so you can use it in your workflows. Again, nothing complicated here.
Here are the steps to follow:
Log in to your n8n dashboard.
On the main screen, right next to the Create Workflow button, you’ll see a small arrow. Click it, then select Create Credential.
From the list that appears, choose OpenAI as the application.
A form will open: simply paste the API key you created in the previous step.
Save, and you’re done.
With these credentials set up, you’ll be able to call OpenAI from your workflows, test requests, and—most importantly—start creating powerful and customized AI agents.
OpenAI credentials in n8n by clicking “Add credentials,” selecting OpenAI, and pasting your API key. - 02
Add a Simple Trigger – When Chat Message Received
Now let’s get into the real action! We’re going to create our first workflow and add a trigger, which is the event that will activate the AI agent.
Here’s how to do it:
From your n8n dashboard, click on Create a Workflow to start a new blank workflow.
In the search bar on the right side of the screen, simply type “Chat”.
From the results, select the trigger When Chat Message Received.
Click on it, and voilà, the node is added to your workflow.
With this trigger, your workflow will be ready to react as soon as a message is received, which is perfect for building a conversational agent. We can now move on to the next step and connect the OpenAI model.
n8n workflow, search for and add the trigger “When Chat Message Received” to initiate your conversational AI agent. - 03
Add an AI Agent to the Workflow
Now that you’ve set up your When Chat Message Received trigger, let’s add the AI agent that will process the incoming messages.
Here are the steps:
Click the small “+” next to the When Chat Message Received node you added earlier.
From the list that appears, select AI, then AI Agent.
Once the node is added, important: leave the default settings as they are.
For the Source for Prompt field, make sure Connected Chat Trigger Node is selected.
Don’t change anything else for now.
With this setup, your AI agent is already ready to receive messages captured by the trigger and respond to them. Next, we’ll enhance this setup to make it smarter and enable it to remember conversations.
AI Agent to add an AI module into your n8n workflow. - 04
Add the Chat Model
Now we’re going to connect the language model that allows your AI agent to understand and generate responses.
Here’s how to do it:
Under the AI Agent node, you’ll see a section called ChatModel (it’s the first one on the left).
Click the small “+” linked to this section.
In the search bar on the right, type OpenAI ChatModel and select it from the list.
In the node settings, make sure to choose the Credential to connect with that you created earlier with your OpenAI API key.
For the model, you can keep the default option or select another one from the list. No need to get into details for now—models evolve quickly, and the main thing here is to validate that everything is working properly.
Once this step is complete, your AI agent will have its “brain” connected and will be ready to process prompts received via the trigger.
OpenAI ChatModel to your AI Agent in n8n by clicking “+”, searching for OpenAI, and selecting your preferred model. - 05
Add Memory
For your AI agent to be truly useful, it needs to be able to remember the context of a conversation. This is where memory comes into play.
Here’s how to add it:
Under the AI Agent node, you’ll see a Memory button.
Click on it.
In the search bar on the right, select Simple Memory for Beginners. This is the simplest memory option and perfect for beginners.
At this point, you’ll see a field called Context Window Length.
This number represents the number of past interactions the AI agent will remember.
In a conversation, this allows the agent to retain previous exchanges in order to provide more relevant and coherent responses. The higher the number, the more context the agent will have, but be cautious—this can also use more resources.
Once this memory is added, your agent will already have a solid conversational base. Next, we can move on to adding the first tool to further enhance its capabilities.
sample memory to your AI Agent in n8n and retain the last 5 interactions for optimal context. - 06
Add Your First Tool
To make your AI agent truly useful, you need to give it access to external tools, called tools. In this example, we’ll connect just one tool: Wikipedia. This will allow it to pull information directly from Wikipedia and provide more comprehensive and relevant answers.
Here’s how to do it:
Under the AI Agent node, click the Tool button.
Click the small “+” below.
In the search bar at the top right, type Wikipedia.
Select the Wikipedia module from the list.
Once added, your agent will be able to query Wikipedia’s data to enrich its responses. This is a great starting point to allow it to pull information and enhance its answers with external content.
Wikipedia tool to your AI Agent in n8n by clicking “+”, searching for “Wikipedia”, and selecting the tool. - 07
Test the First Conversational AI Agent in n8n
Congratulations, your conversational AI agent is ready!
You’ve just created your first AI agent in n8n.
To test it:
Click on OpenChat at the bottom of the screen.
Type your messages in the box at the bottom left.
Ask your questions, and it will respond live.
Example question connected to Wikipedia:
“What year was Julius Caesar born?” → The agent will look up the answer on Wikipedia and provide it.
But know that it’s very easy to take it further:
Instead of a chat message trigger in n8n, you can connect a Telegram channel, for example.
This will allow you to chat with your AI agent directly on Telegram (or any other tool connected to n8n).
You can link any tool you want to this AI module, give it the intelligence you need, and start conversations wherever you want, however you want.
Build an Autonomous AI Agent in n8n to Summarize RSS Feeds and Send Them to Notion.
In this tutorial, you’ll learn how to create an autonomous AI agent in n8n that can automatically summarize an RSS feed in French. The main goal isn’t to build a complex agent, but to understand how to retrieve, process, and synthesize external data using AI. This project will help you deepen the basics covered in the first tutorial and apply AI to real-world use cases, which you can later expand with other sources or channels like Telegram.
- 01
Create a Notion API Key and Prepare the Database
Start by generating a Notion API key. Click on your workspace in the top left, go to Settings → Connections → Manage Integrations. Create a new integration, select your workspace, set the type to internal, save, and get your API key.
In n8n, add these credentials: click on Create Credentials, select Notion, and paste your API key.
Finally, create a Notion database with the columns ID and FrenchResume — this is a mandatory prerequisite.
Notion API key by creating an integration named “n8n” and copy-pasting the key to automate your RSS feed summary workflow. - 02
Add the RSS Feed Trigger
In n8n, click the + in the top right and search for RSS Feed Trigger. Select the first result.
In the Feed URL field, paste this example feed: https://seths.blog/feed/atom
RSS Feed Trigger in n8n by searching for “RSS Feed Trigger” and pasting the URL of your feed. - 03
Configure the AI Agent
Click the + again, search for AI, and select AI-Agent.
In Source for Prompt User Message, choose Define Below and add this prompt:
“Incoming article:
– ID: {{ $json[“id”] }}
– Content: {{ $json[“content”] }}Your task:
Decide if the article has already been processed, summarize if necessary, and store it in the Notion database.”In System Message, paste this prompt:
“You are an expert autonomous assistant managing marketing blog articles.
system prompt and user prompt directly in your n8n AI Agent to guide the RSS feed summarization.
Your goal:
– Process new RSS articles and manage their storage in Notion.
Workflow:
1. When you receive a new article:
– CALL THE GetAllPage TOOL **ONCE** to retrieve the database.
– WAIT for the GetAllPage response.
2. Check if the current article ID exists.
3. If it exists → skip further actions.
4. If not:
– Generate a short French summary.
– CALL THE CreateNotionPage TOOL.
Rules:
– NEVER CALL GetAllPage MORE THAN ONCE PER ARTICLE.
– WAIT FOR tool results before continuing.
– Do NOT send raw JSON or tool outputs in your message.
– Do NOT explain your reasoning.” - 04
Add the OpenAI ChatModel
Add an OpenAI ChatModel module and leave the default model selected. It will serve as the AI engine to generate summaries in French.
OpenAI ChatModel to your AI Agent in n8n by clicking “+” and selecting your preferred model. - 05
Configure the Notion Tools
Add two Notion Tool modules: GetManyDataPage and Create a Notion Page.
For GetManyDataPage, set the Tool Description (set manually) as:
“Tool Name: GetAllPage
Description: This tool retrieves all articles from the Notion database. It returns two key fields for each article: – ID → the unique article identifier. – FrenchResume → the French summary of the article. You must use this data to determine if the current article has already been processed.”For Create a Notion Page, set the Tool Description (set manually) as:
“Tool Name: CreateNotionPage
Description: This tool creates a new page in the Notion database. It takes two inputs, which must match the node’s parameters exactly: – title → the article’s unique identifier (used as the page title) – FrenchResume → the French summary generated by the AI It does not perform any validation or summarization.” Notion tools (“GetManyDataPage” and “CreateNotionPage”) under your AI Agent, adjusting prompts and fields step by step. - 06
Test the Autonomous AI Agent
Run a test of the module. The agent will check if the article from the RSS feed already exists in Notion. If it doesn’t, it will automatically create a new entry with a French summary of the article.
AI Agent in n8n automatically generate summaries and populate your Notion database in real time. - 07
Why Do We Call It an “Autonomous AI Agent”
An AI agent is not only designed to chat or answer questions, as shown in Tutorial 1. Here, we’re talking about an “autonomous” agent because it can take actions on its own, without human intervention.
Specifically, it is connected to tools like Notion and RSS feeds so that it can analyze information, make decisions (for example, check if an article already exists), and perform tasks automatically (such as summarizing the article and adding it to the database).
With every new RSS feed detected, the agent operates entirely autonomously: it checks, decides, and acts without needing any intervention. That’s the true power of an autonomous AI agent.
The full automation, in your inbox.
n8n JSON, written guide and video tutorial, everything to ship this in under 15 minutes.
- Complete n8n scenario JSON
- Step-by-step setup documentation
- Full video walkthrough